
Contributor: Michael Garza
So first things first!
THIS IS ALL THE STUFF YOU ARE GOING TO NEED:
1X “dirty air” budget DIY kit:
http://dirtyworks-kc.com/products/dirty … ilders-kit
1X each 18g auto wire (buy red and black):[/color]
RED:
http://tinyurl.com/qcw67de
BLACK:
http://tinyurl.com/mjsubyv
1X electrical tape:
http://tinyurl.com/kht7tkk
2X 4FT shrink tube:
3/16″:
http://tinyurl.com/owzk574
1/4″:
http://tinyurl.com/q2ewaj7
1Xeach zip ties both small and large:
http://tinyurl.com/pkrsudv
http://tinyurl.com/kprgsqw
2X 1/2-13×4 stainless Bolts:
http://tinyurl.com/ozetufc
1X 1/2″ zinc/nylon locking nut:
http://tinyurl.com/psoa8kr
1X 1/2″ stainless Nut:
http://tinyurl.com/kq55cgq
OR LOCKING (NO MOD)
http://tinyurl.com/mmscjof
1X 5/8″id Shaft Set Collar:
http://tinyurl.com/pgf8xc2
(Ace & home depot/lowes might have them as well)
6X 7/16″ washers:
http://tinyurl.com/on7bf7n
1X 2.5″L x 1/2″od iron pipe:
http://tinyurl.com/m7fxw2w
(DO NOT WELD ZINC OR GALVANIZED IT CAN KILL YOU)
1X 1.5″L X 5/8″od X 1/2″id steel spacer:
http://tinyurl.com/pu9afot
1X Loctite “lock tight”
http://tinyurl.com/mbeej2s
2x monetary buttons:
http://tinyurl.com/ntt3vtu
Paint the color of your chuckus
Tools needed:
5/8″ drill bit
1/2″ drill bit
Drill
Angle Grinder
Dremel
Dremel Cut off wheels
Sanding wheels
Welder
Hack saw OR bandsaw (or if you have it a metal lathe)
Measuring tape/ caliper
Alan keys metric & standard
Socket wrench (set) standard and metric
Optional:
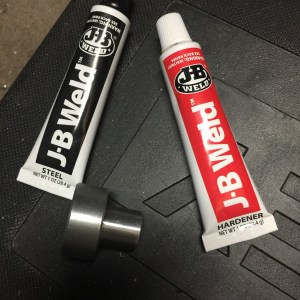
1x JB weld
1/8″ 4″ x 5″ plate steel
8-32 tap and drill bit
4X 5/8″L 8-32 screws
Extra tubing threw dirty air (you pry won’t need this)
NOW THE INSTRUCTIONS YOU GET WILL LOOK SOMETHING LIKE THIS:

(((YOU CAN STILL USE THE SAME WIRING AND SHOCK SETUP IF YOU DON’T WANT TWO SWITCHES AND WANT TWO SHOCKS OR JUST WANT ONE SWITCH AND ONE SHOCK))) ITS FINE, BUT FOR THIS WE ARE DOING THIS SETUP:

THESE ARE THE MODIFICATIONS YOU ARE GOING TO HAVE TO MAKE:
First thing you will need to do is remove the old shock then cut & weld in the 1/2in iron pipe listed:
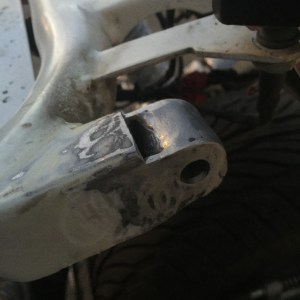
This reinforces the two pieces of metal almost like boxing in.you will also need to use the half inch drill bit and a drill to open the holes in this mount once painted it should look like this:
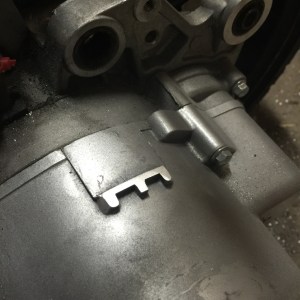
Now you need to cut this off and smooth it down (If you have a ankle biter you can skip this step):
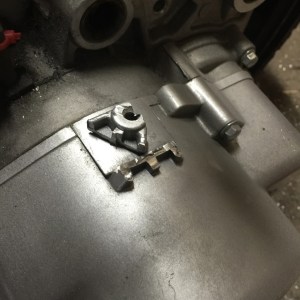
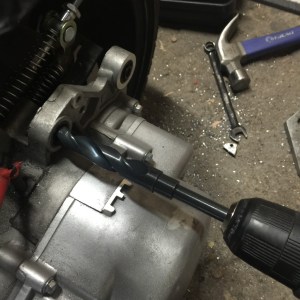
Next you need to knock out a bushing or drill it out using a 5/8in drill bit. Leave some rubber don’t drill it all out (You no longer need this your shocks have them)shown here:

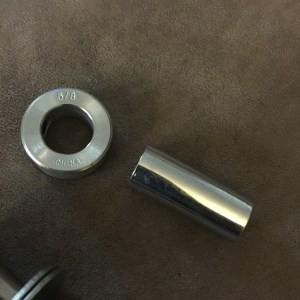
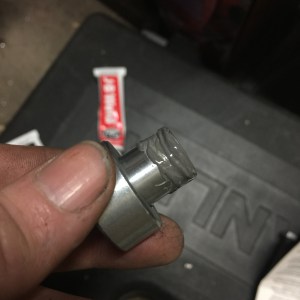
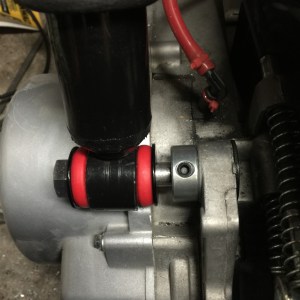
Next you need to take your 5/8in collar and 5/8od x 7/16id spacer and put the spacer in just to the edge and tighten it good enough for measuring. Once done measuring & cutting use loctite to secure the set screw permanently:
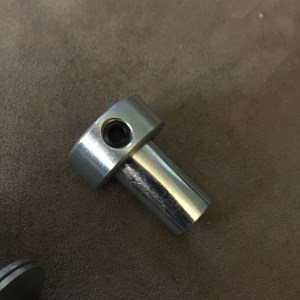
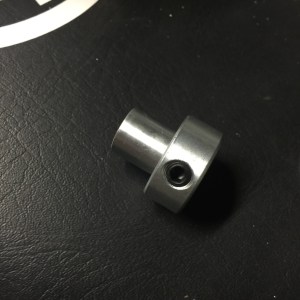
Next you need to seat the collar and the spacer into the old bushing mount hole using a hammer. (jb weld used but not needed):


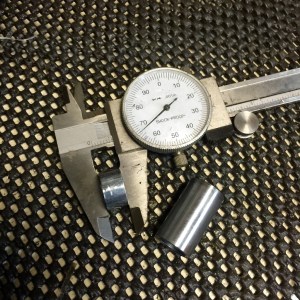
Next you are going to have to grind down one side of the 1/2in nut that goes behind the lower motor mount and cut the bolt or grind it down in length too as well as cut the washer that goes before the nut for everything to fit. (Notice how I size the bolt using all of the washers and the shock) Leave enough room for the nut to thread all the way in the nut also if you buy the shorty nut you can skip grinding it down.:
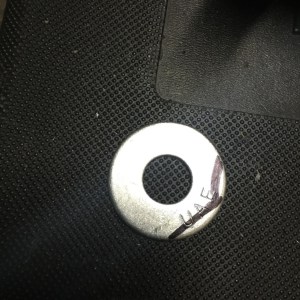
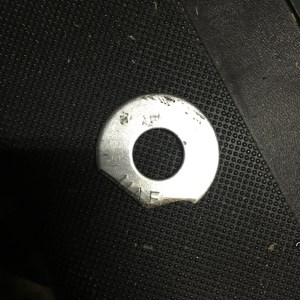
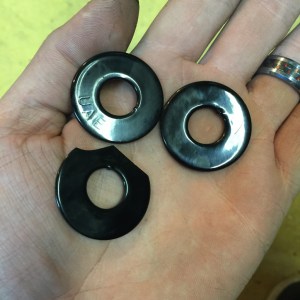
OK! Once you’ve completed this now you can spray paint your washers or do like me and powder coat them.
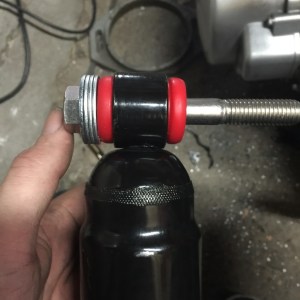
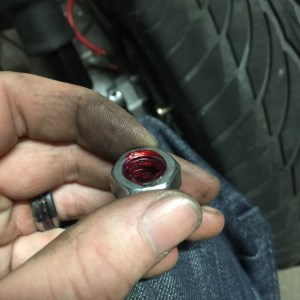
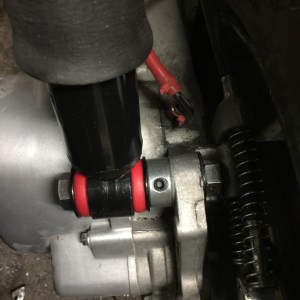
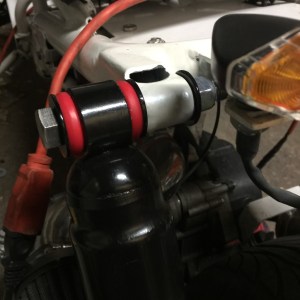
Put some loctite in the nuts and start putting it on! You should hold the nut with a wrench and turn the bolt till it catches and keep turning till its tight. Do the same for the top also this might be loaded don’t be afraid to push it in or pull it out. Just make sure the air plug for the hose is out when you do so it can let in air or let it out:
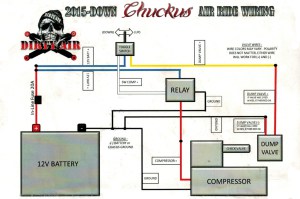
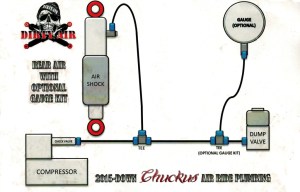
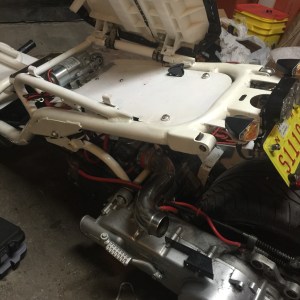
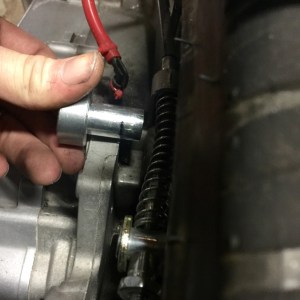
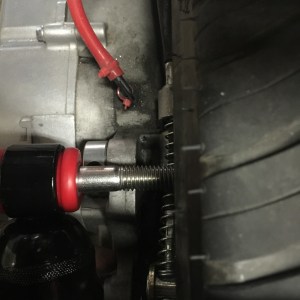
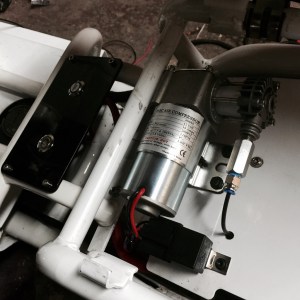
Now that all of this is done just follow the wiring diagram you cant go wrong! Feel free to mount in the same spot as me or anywhere that you feel is free to fit the pump and relay. The dump I mounted close to the shock under the seat pan attached to the seat pan ((not the seat.)) Here is an example of where I mounted my pump/ relay and switch box:
I’d like to thank all who took the time out to look this over! I hope it helps on your journey with your chuckus to becoming what you want it to be! If you have any questions feel free to hit me up on the chuckus life Facebook group I’d be happy to answer any and all questions you may have! Thanks! ![]()

