The Fuerza comes from the factory with a 15 tooth front sprocket. The stock sprocket is pretty good for a quick launch, but it limits top speed to about 53MPH and makes first gear pretty much useless, since it revs out at less than 10MPH.
16 tooth and 17 tooth sprockets can be found online for $10.00-$15.00 and will allow you to easily achieve a higher top speed and lower RPM’s when cruising. You need a size 428 sprocket for a 17mm shaft with bolt spacing of 31mm (see links below).
The 17T sprocket will allow a top speed of about 60MPH on flat ground, but will most likely cause you to gradually lose speed when climbing hills if you weigh more than 150lbs. A 16T front sprocket would probably be a good choice with the stock 125cc engine if you weigh more than 150lbs.
428 17T Sprocket
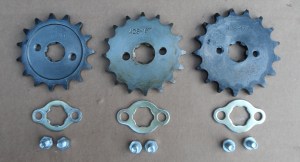
The photo below shows the three most common sizes. Adding one tooth on the front sprocket has about the same effect as dropping 3 teeth on the rear sprocket.
To install a new front sprocket, you will need the following tools: 8mm & 10mm sockets, 14mm & 17mm wrenches.
Start by putting the transmission in neutral and loosening the chain to allow enough slack to remove the front sprocket. There is no need to remove the chain, there will be enough slack to install the new sprocket without much trouble.
You will need a 14mm & 17mm wrench to loosen the rear axle. Once that is done, use the 14mm wrench to loosen the jam nuts on the tension bolts. Loosen the outer bolt first, then the inner will be easy to adjust.
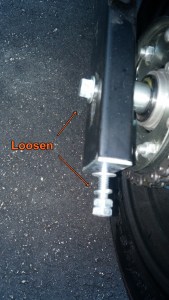
With everything loosened up push forward on the rear tire to provide as much slack in the chain as possible.
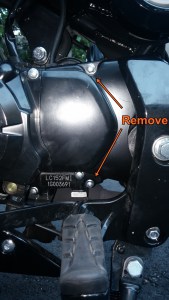
Remove the 2 bolts from the front sprocket cover with an 8mm socket and pull the cover off.
The sprocket is held onto the shaft with a toothed sprocket plate. Remove the bolts that hold the sprocket plate on with a 10mm socket.
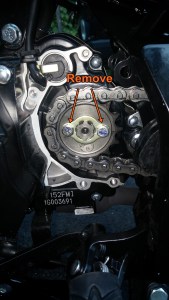
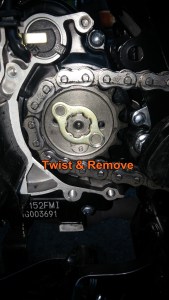
Once the bolts are out, rotate the sprocket plate until it can be removed. The splines on the shaft are not even, you will have to twist the sprocket plate until it matches up with the splines, then it will pull off easily.
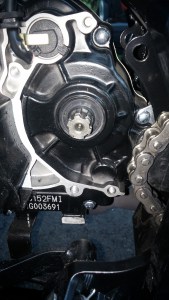
With the sprocket removed, inspect the shaft for any signs of wear or damage. Clean up any dirt and grease before installing the new sprocket.
Install the new sprocket by reversing the order of removal. Be sure to clean your new sprocket with brake cleaner to get any grease out of the holes in the threads and use blue threadlocker to keep things from rattling loose. Once you know which sprocket you want to use long term, go back and apply red threadlocker so you don’t have to think about it again.
Rolling the bike back and forth a few feet will help to allow the chain to settle onto the sprockets. Adjust the chain tension so that there is about an inch of deflection in the center of the chain.
Make sure to adjust both sides of the axle the same amount to align the rear wheel. There are index marks on the axle plates, but using a ruler on the adjustment bolts will give you a more accurate result.
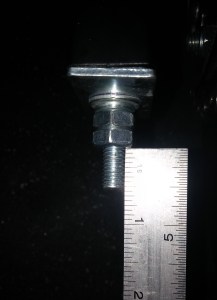
The actual measurements on your adjuster bolts will be different based on the size of the sprocket installed and how much the chain has stretched. As long as the measurements are even on both sides and the chain deflection is 0.8″-1.2″ you should be all set. Be sure to check the chain deflection on a regular basis and adjust as necessary. A chain that is too lose will cause your sprockets to wear quicker than they should and could pose a serious safety risk. If you have any questions, contact Darby Brown on the ChuckusLife Facebook page.
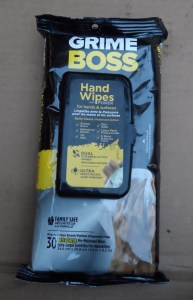
If you are anything like me, you will want to hop on the bike and go for a ride ASAP. A package of hand wipes like the ones shown below will allow you to jump right on without getting grease everywhere. They will also work well to prevent you from destroying everything between working on your bike and getting to a sink where you can wash your hands. Your wife, mom, significant other will probably appreciate these things even more than you will Grime Boss Hand Wipes.